Documents | Plan | Retina | Loading | Isodose | RDAH | Points | Profile | Tables | Summary | Plaque | Image | Setup

ImagesPage1

Click to enarge.

ImagesPage2

Click to enarge.

ImagesPage3

Click to enarge.

ImagesPage4

Click to enarge.

ImagesPage5

Click to enarge.

ImagesPage6

Click to enarge.

ImagesPage7

Click to enarge.


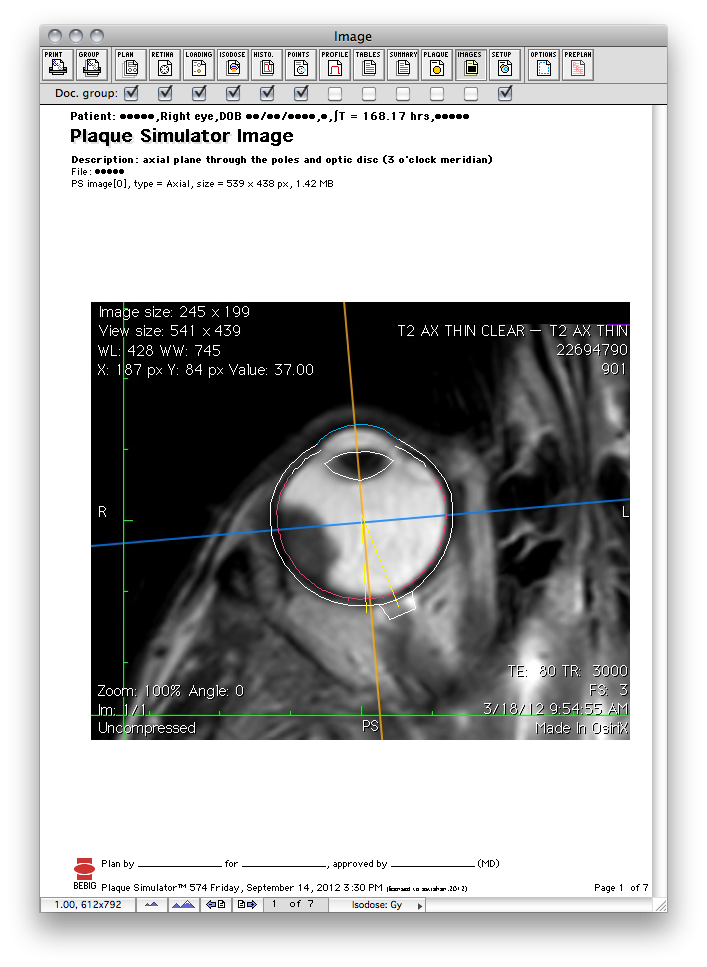
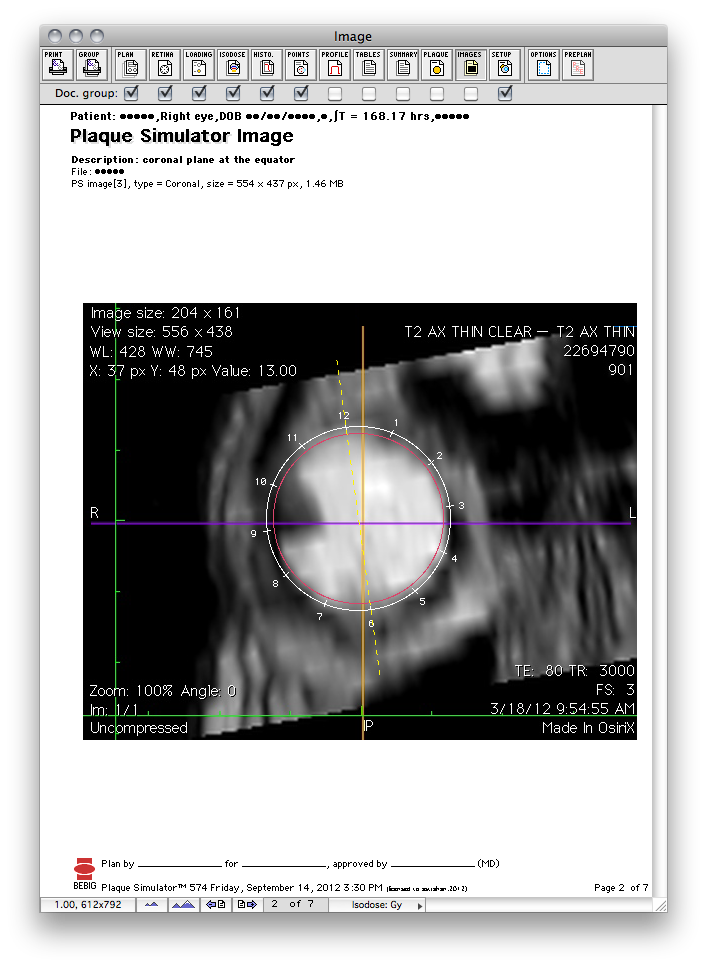
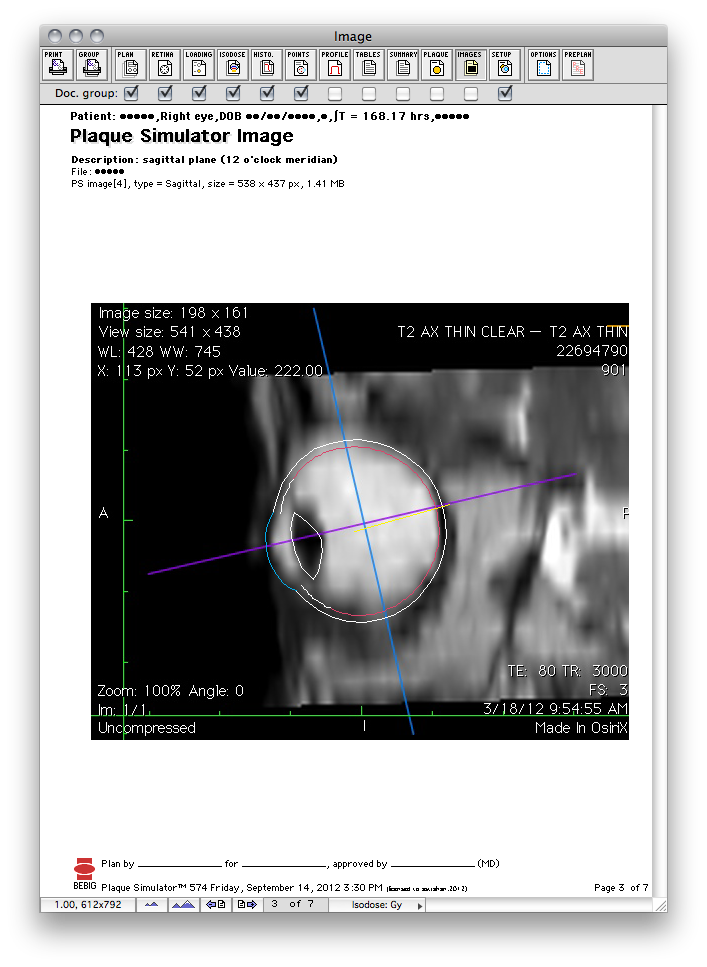
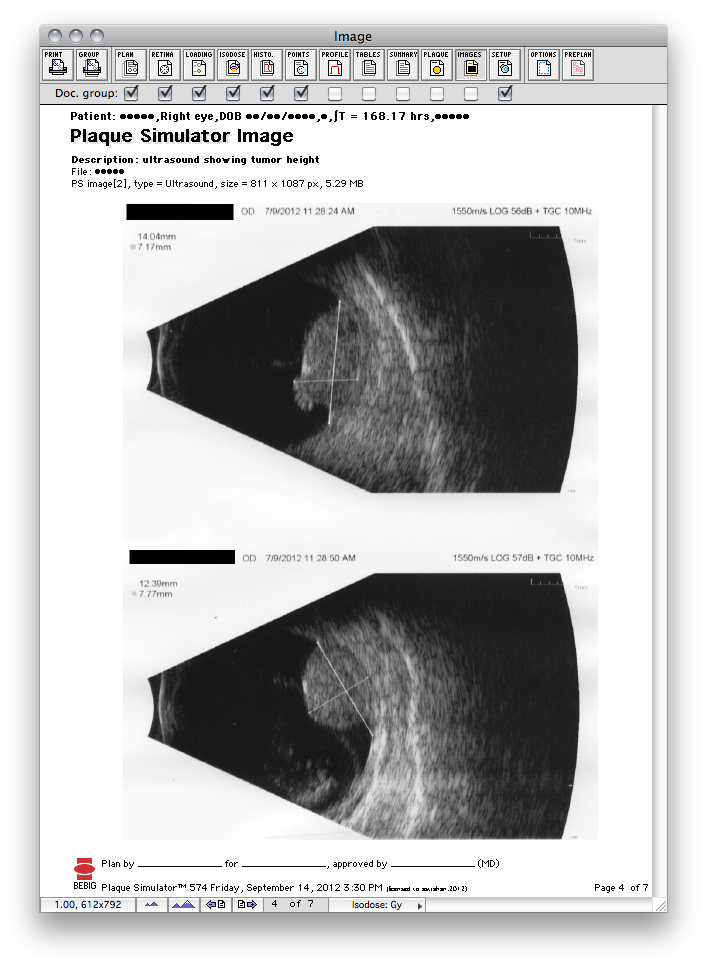
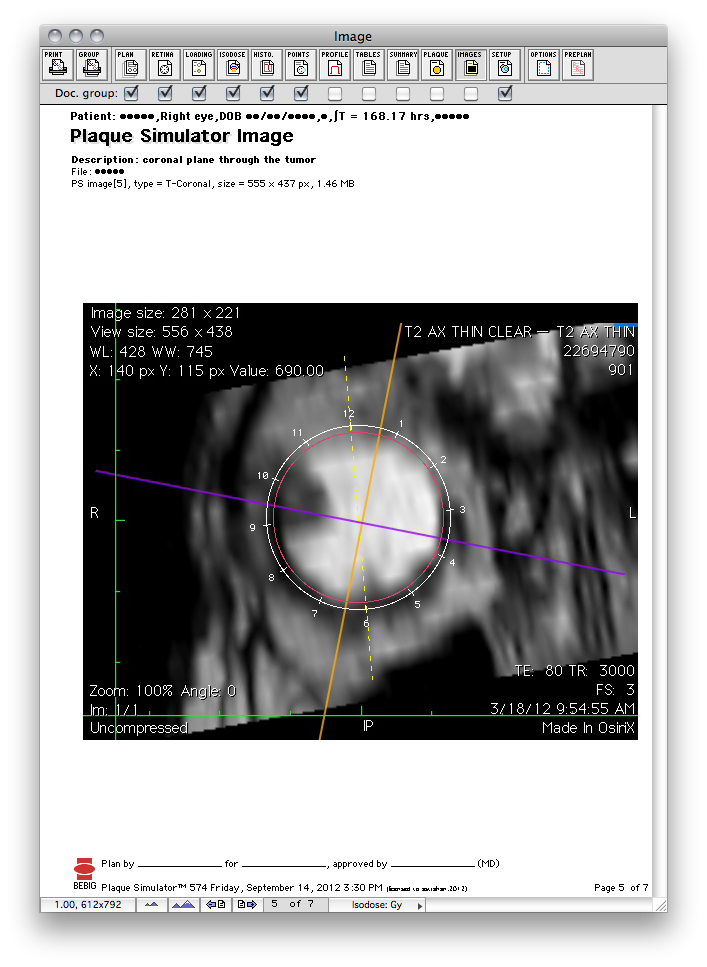
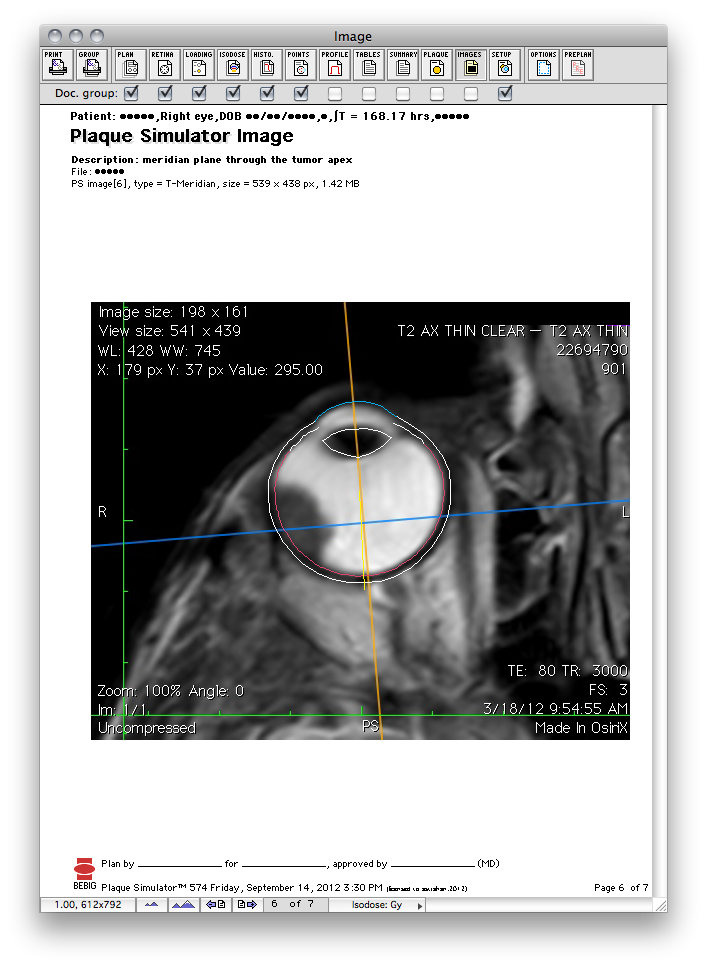
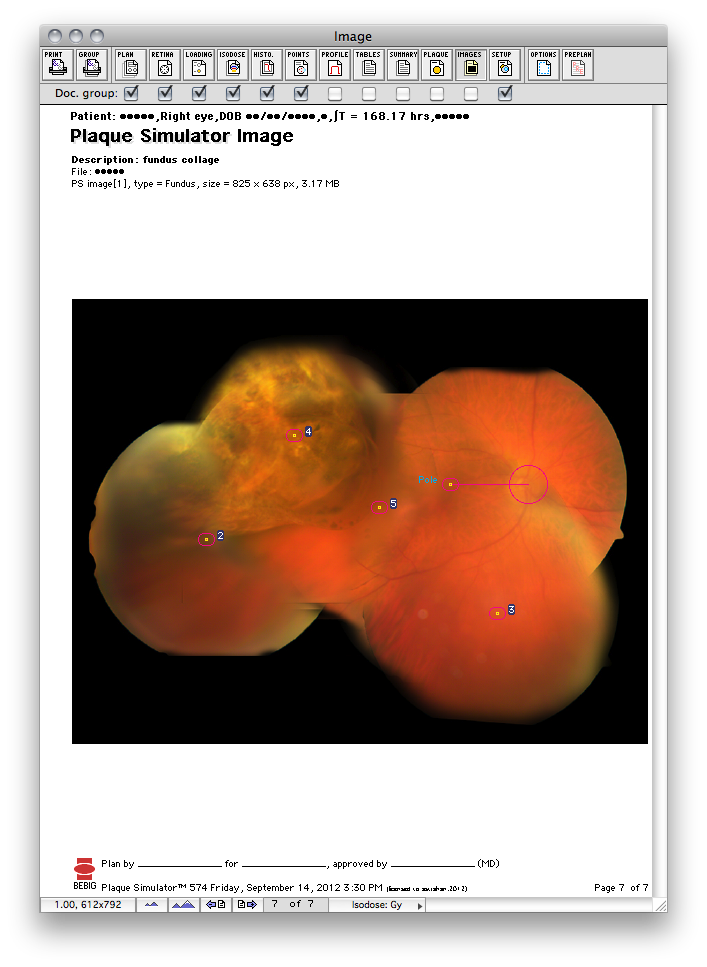
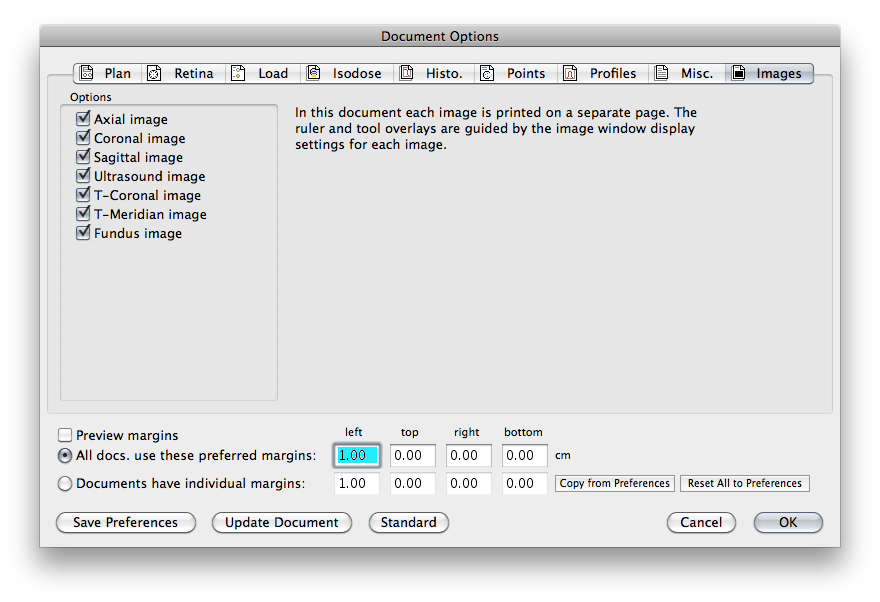
The Images document can print between 1 and 7 pages. The appearance of the image is guided by the current settings for each image in the PS Imaging window. For instance, to overlay the eye sizing tool or a calibration ruler onto the printed image, enable the tools for that image in the imaging window. You can choose which images to print from the document options dialog.

  • Page 1 prints the axial image.
  • Page 2 prints the coronal image.
  • Page 3 prints the sagittal image.
  • Page 4 prints the ultrasound image.
  • Page 5 prints the tumor-coronal image.
  • Page 6 prints the tumor-meridian image.
  • Page 7 prints the fundus collage.

  • The print buttons at the upper left of the window initiate either single document or document group printing.
  • The checkboxes below the document selection buttons at the top of the window indicate which documents will be included in group printing.
  • You can customize a document by clicking the Options button, by double-clicking in the middle of the document window, or by selecting any of the Document Options... menu items.
DocOptionImages

Plan | Retina | Loading | Isodose | RDAH | Points | Profile | Tables | Summary | Plaque | Image | Setup
Documents Menu | Documents Window | Guide Contents