Calibrating the BEBIG COB Plaque
In this tutorial we will create a model of plaque COB 932 from the sample data sheets.
|
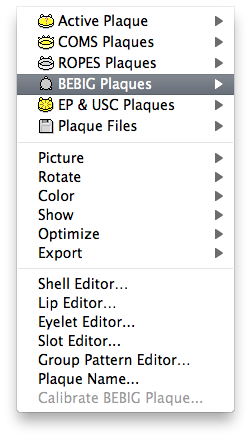
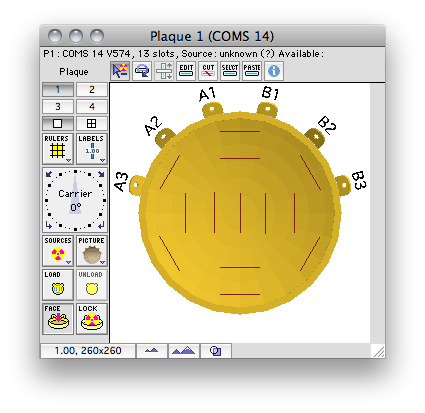
- Bring the Plaque window to the front.
- Select plaque #1.
- The displayed plaque will most likely be whatever your preferred startup plaque is. Whatever plaque is displayed, ignore it! We are going to replace it in the next step.
|
|
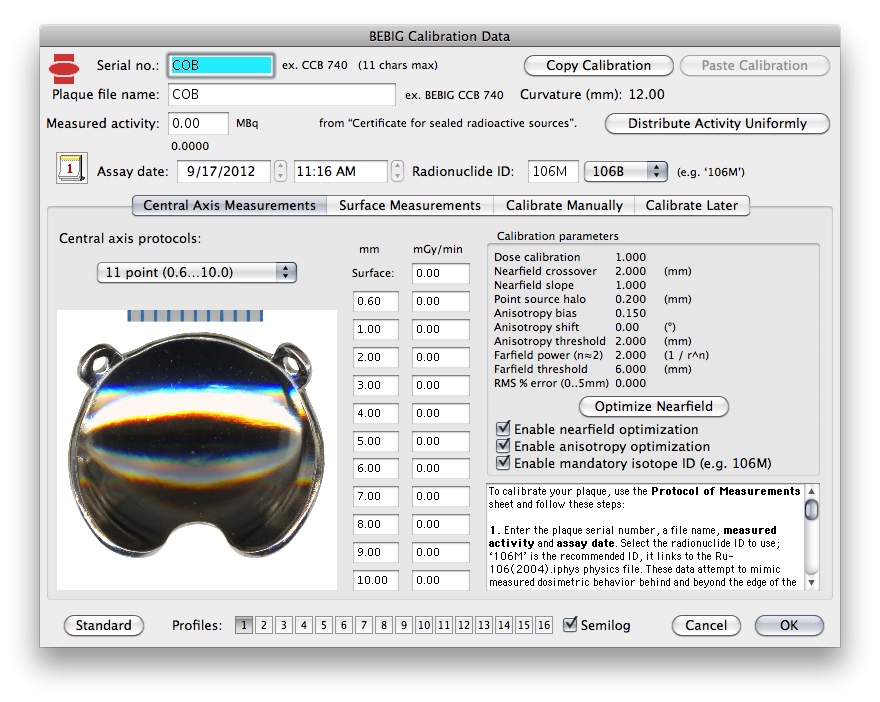
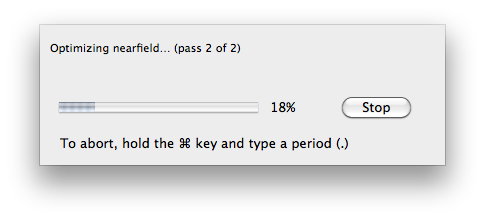
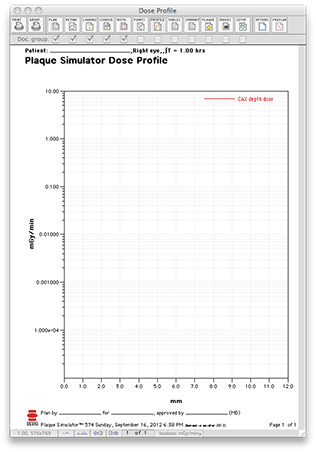
- The calibration dialog will open automatically.
- The document window will also open in the background to display the central axis dose profile.
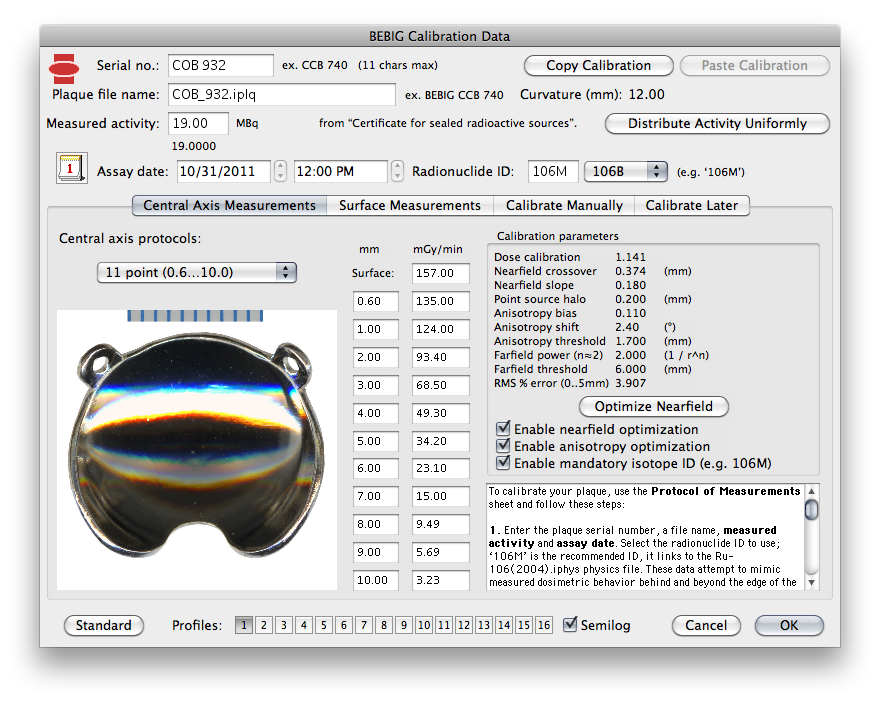
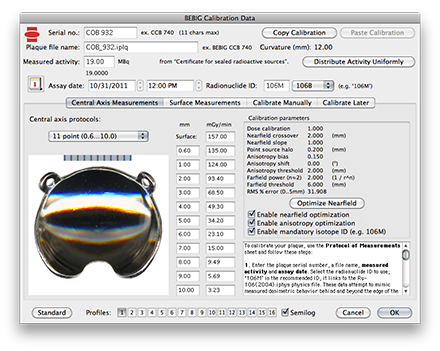
- Click the Central Axis Measurements tab.
|

|
|
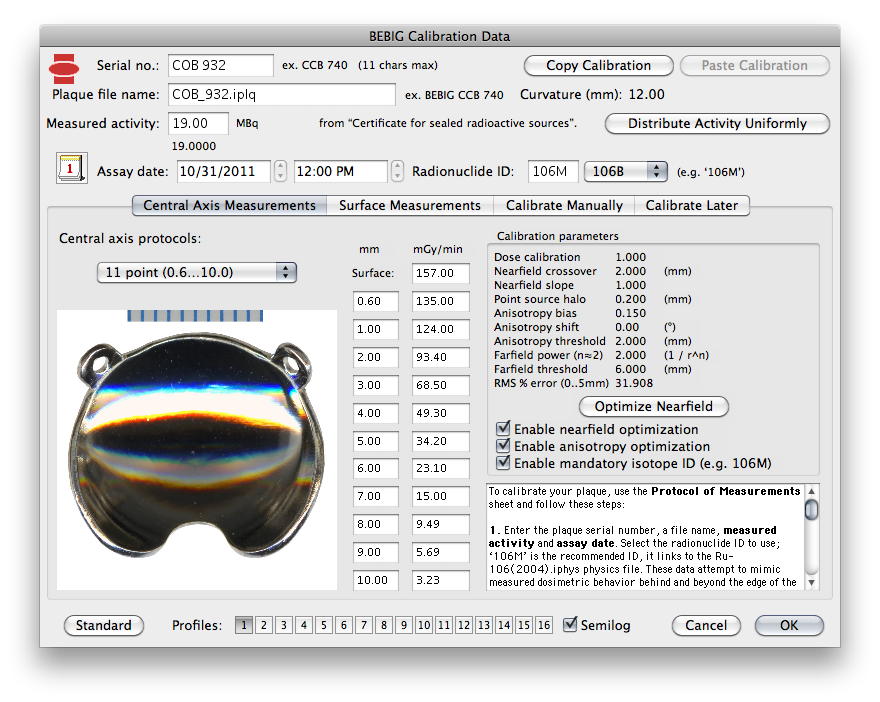
- Enter the Serial no. COB 932.
- Enter the Plaque file name COB_932.iplq.
- Enter the Measured activity 19.0 from the Measurements certificate sheet.
- Enter the Assay date 10/31/2011 12:00 PM.
- Select Radionuclide ID 106M from the popup menu (the dialog should default to 106M).
- Select Central axis protocol 11 point (0.6...10.0) from the popup menu (the dialog should default to this).
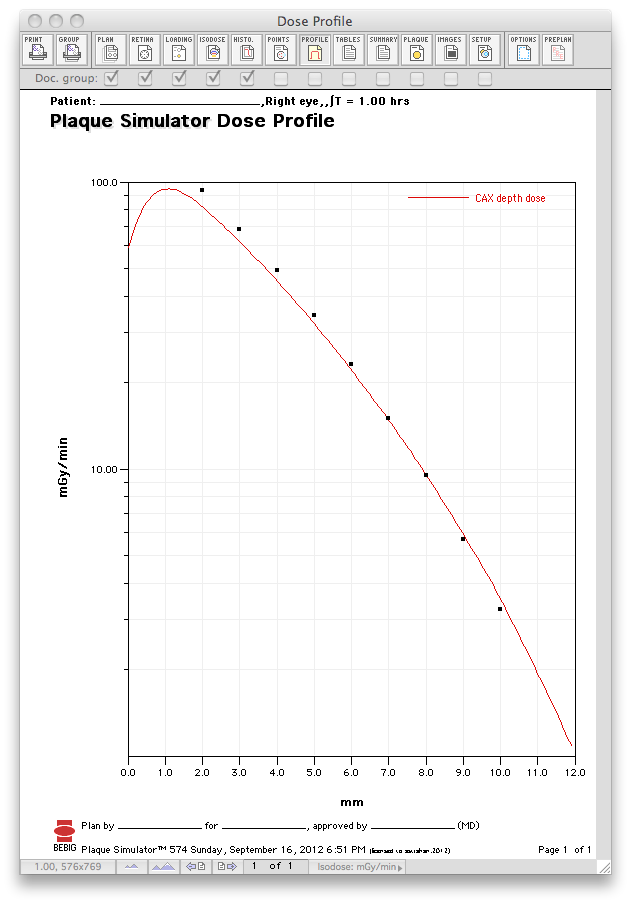
- Enter the central axis data from the Measurements protocol sheet.
- Click the Distribute Activity Uniformly button.
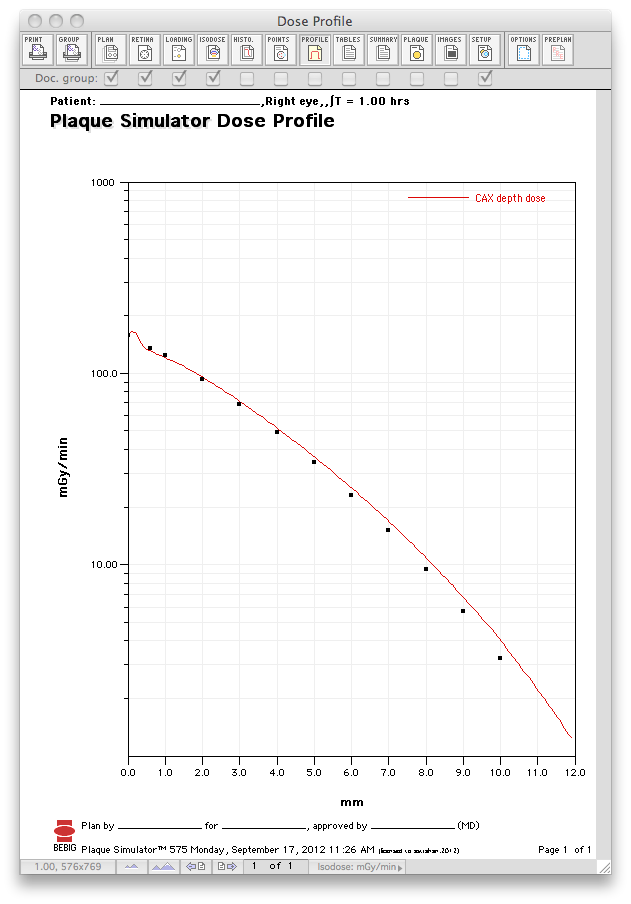
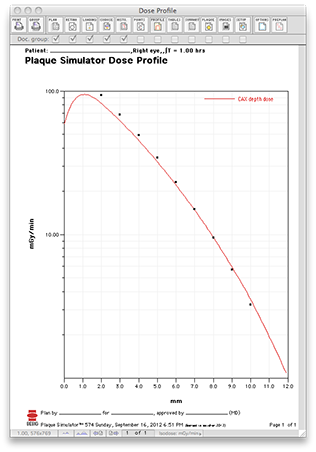
- The uncalibrated dose profile should appear as illustrated.
|
|
|
Click on this link to proceed to Surface Measurements section of the calibration process.
Calibration |
Certificates |
Axial Measurements |
Surface Measurements |
Manual Tuning |
Fine-Tuning Steps
Save as File |
Plaques Menu |
Guide Contents