The Inventory List Dialog |
|
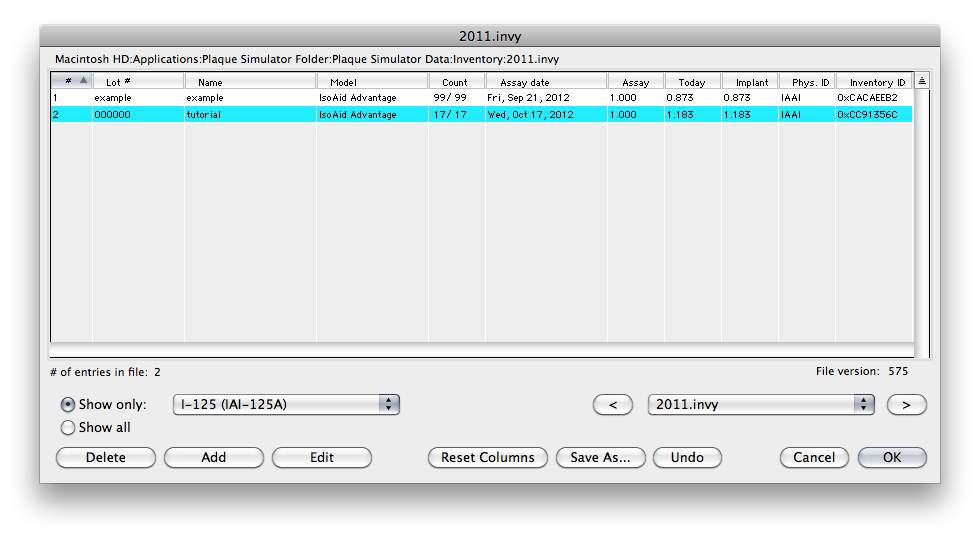
Radionuclide source quantity and assay data is maintained in an inventory file. Inventory files should be stored in the Inventory folder in Plaque Simulator's master data folder. Plaque Simulator parses the entire master data folder at startup and builds a list of the inventory files it finds. The 1st item in the list (which is sorted alphabetically) becomes the startup inventory unless you have specified an inventory preference. The popup menu and [<] [>] buttons at the lower right cycle through that list. The Show only filter in this dialog can be set to display only a particular source model (e.g. I-125 IAI-125A) or all models. Clicking the icon in the upper right corner of the list just above the vertical scroll bar switches between ascending and descending sort order. Click on a column title to set the sort key. To select an inventory entry, click on it in the display list. You can add, edit, delete, cut (command-x), copy (command-c) and paste (command-v) inventory entries. To edit an inventory entry, first select it in the list and then click the Edit button or simply double-click in the list. To create a new entry use the Add button. The Delete button disposes of the currently selected entry. Changes to the inventory file are not permanent until you click the Save As... button to update the disk file. Sources are removed from the inventory as you install them (e.g. by clicking on an empty slot in the plaque), and are returned when you remove them (e.g. by clicking on a filled slot in the plaque) or change to a new plaque. When removing sources from a plaque, Plaque Simulator will automatically create a new inventory entry for a source that it can't find in any of the known inventory files. |