Measure Eye Size

Using the calibrated axial CT or MR image to measure eye size

Assure that the axial image is being displayed and click the Eye button adjacent to the Calib. button to display the eye sizing tool.

ImageWndwCTGroupEye
  • Turn off the Ruler tool. If you leave the ruler enabled it might overlap the eye in the image and interfere with your ability to interactively drag the eye sizing tool control points.
  • Select left or right eye using the button just below the Eye button. The eye sizing tool orientation will adjust to the selected eye.
  • Click in the middle of the eye sizing tool and drag the tool over the appropriate eye.
  • Adjust the eye size to match the image by dragging the control markers. The dimensions of the eye are displayed in the status line just under the window title bar. You can enlarge the image in the vicinity of the eye using the "zoom" buttons at the lower left of the window.
  • The red marker rotates the tool. The white and green markers control the diameter of the eye and lens position. The blue markers adjust the cornea & limbus. The magenta marker adjusts the ellipsoidal appearance of the anterior hemisphere of the model. The yellow lines of the tool represent an angle at the center of the PS model between the posterior pole of the eye and the center of the optic disk.
CalibrateCTEyeTool

The 3D model in the setup window will change immediately in response to changes in the eye sizing tool so experiment with the tool's control handles to learn their properties. Place the Setup and Image windows side-by-side as you drag the eye sizing tool control handles to observe the behavior of the model.


The other eye sizing tools

Open and load other CT or MR image planes in the same way as the axial image. The primary difference between image buffers in PS is that the eye sizing tools differ in appearance. Properly positioning and orienting the eye sizing tools on each image is the ONLY way PS can know how to display the image in 3D space and in 2D planar dosimetry space.

ImageAxialMenuX

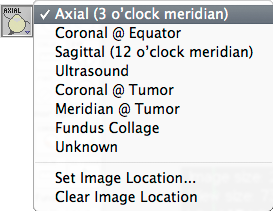
The expected type of image that will be loaded into each of Plaque Simulator's five CT/MR image buffers defaults at startup to match the name of the button associated with that buffer (e.g. the buffer activated by the Axial button defaults to type axial, the Equatorial buffer to type coronal at equator). You can, in fact, load almost any kind of image into these buffers. PS will interpret the image according to the setting of the contextual menu associated with each image button. WARNING: PLEASE DO NOT CHANGE THESE SETTINGS unless you are a very experienced use of PS. If you change the image type settings to differ from the button names, PS will not be able to properly interpret or display those images in other windows, and will not be able to properly overlay isodose lines on the images.

EyeToolAxial
Axial
EyeToolEquatorial
Equatorial
EyeToolSagittal
Sagittal
EyeToolTCor
Tumor-Coronal
EyeToolTMer
Tumor-Meridian


Advanced Tutorial | Eye Size Dialog | Guide Contents