The setup appearance window is opened by clicking the appearance button AppearanceButton located along the bottom of the Setup window. In this window you can customize the appearance of the model and adjust the opacity settings for many of the components of the 3D model.

SetupAppearance
Ocular anatomy group

The buttons of this group switch between 3D surface and edge (ie wireframe) rendering.

  • Edges - Only the edges of the triangles that form the surface of the eye will be rendered. This is also known as 'wireframe' mode.
  • Surface - The triangles that form the surface of the eye will be rendered as a solid surface according to the selection below:
    • Translucent - The eye will be rendered translucently.
    • Opaque - The eye will be opaque.
Edges

Edges (wireframe)

Translucent

Translucent

Opaque

Opaque

Other objects group

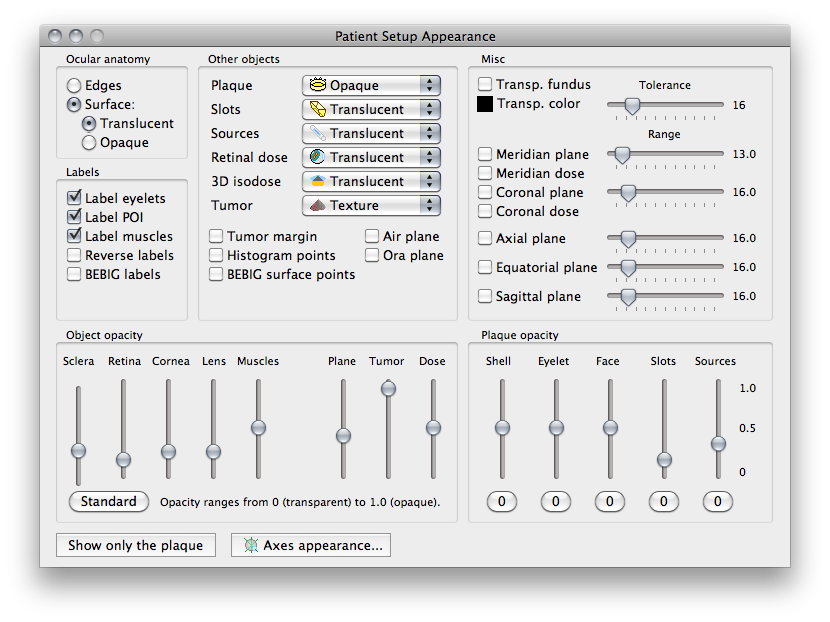
The menus of this group modify the rendering of the plaque, isodose surfaces and tumor.

  • Plaque - provides additional control over 3D rendering of the plaque.
  • Slots - provides additional control over 3D rendering of the slots in a plaque.
  • Sources - provides additional control over 3D rendering of the seeds in a slot.
  • Retinal dose - provides additional control over rendering of dose to the retinal surface.
  • 3D isodose - provides additional options for 3D rendering of isodose surfaces.
  • Tumor - provides additional options regarding the shape and appearance of the tumor.

The buttons of this group enable the 3D display of objects which may be of interest for educational and/or software development purposes.

  • Tumor margin - plots the tumor margin.
  • Histogram points - plots points used to calculate histograms.
  • BEBIG surface points - plots the BEBIG surface points.
  • Air plane - shows the air-tissue boundry plane.
  • Ora plane - shows a cornal plane through the ora-serrata.
Labels group
  • Label eyelets - adds labels to the plaque eyelets.
  • Label POI - adds labels to points of interest.
  • Label muscles - adds labels to the muscle insertion markers.
  • Reverse labels - reverses orientation of the labels.
  • BEBIG labels - adds labels to the BEBIG surface points.
Misc. group
  • Transp. fundus - makes one color of the fundus photo collage transparent.
  • Transp. color - selects the fundus transparent color (e.g. black).
  • Meridian plane - shows the meridian CT image.
  • Meridian dose - adds isodose lines to the meridian plane.
  • Coronal plane - shows the coronal CT image
  • Coronal dose - adds isodose lines to the coronal plane.
  • Axial plane - shows the axial CT image.
  • Equatorial plane - shows the equatorial CT image.
  • Sagittal plane - shows the sagittal CT image.
  • Sliders - the sliders next to each plane button determine the how much of the CT image surrounding the eye is displayed.
Object opacity group

The sliders in this group modify the opacity of the indicated object. An opacity of 1.0 is completely opaque, 0 is entirely translucent, 0.5 blends the object and background equally.

  • Sclera - .
  • Retina - .
  • Cornea - .
  • Lens - .
  • Muscles - .
  • Plane - .
  • Tumor - .
  • Dose - .
Plaque opacity group

The sliders in this group modify the opacity of the indicated object. An opacity of 1.0 is completely opaque, 0 is entirely translucent, 0.5 blends the object and background equally.

  • Shell - .
  • Eyelet - .
  • Face - .
  • Slots - .
  • Sources - .
Footer buttons group
  • Show only the plaque - hides everything except plaque related items, mainly used when designing plaques.
  • Axes appearance... - open the axes appearance window.

View Menu | Setup Window | Guide Contents