Printing to paper or .pdf file

Plaque Simulator prints its documents to paper and/or .pdf files. Printing to .pdf files is a very convenient way for your treatment planning team to collaborate throughout the planning process. You can distribute pre-plan proposals electronically as email attachments and later electronically archive the finished plans. This portion of the user guide discusses the initial steps required to print to paper and/or to create the.pdf files.

Before you can share .pdf plans electronically, however, the files must first be encrypted and they usually need to be compressed as well because many email servers limit email attachment file size to 10 MB or smaller. The post-printing preparation of .pdf files for use as email attachments is discussed in detail at this link in this user guide: Compressing and Encrypting Treatment Plan .PDF Files.


Page Setup

Before you print, either to paper or to electronic file, you should select a paper size, orientation, and optionally a printing device. The PS recommended paper size is US Letter. A4 paper will also yield acceptable results. The PS recommended paper orientation is portrait. You may optionally print in landscape orientation but the page layout will not be as efficient.

  • From the File menu select Page Setup...
  • In the OSX Page Setup panel Page Attribues section select a printer, paper size and orientation.
  • Set the printing scale at 100%.
  • Click the OK button to continue.
FilePageSetupMenu
PageSetup

Printing a single document

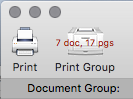
You may print PS documents either individually or as a combined document group. An individual document, such as a treatment plan or a plaque loading sheet, consists of at minimum 1 page and can range up to 9 pages depending on your document preference settings.

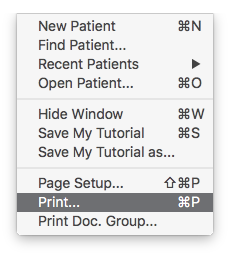
To print only the document currently being displayed in the Documents preview window select Print... from the File menu or click the Print button in the preview window toolbar. This will open the OSX print panel window.

FilePrintMenu
PreviewPrintButtons

Shortcut: To bypass the OSX print job panel and print directly to a .pdf file in the current patient folder using the PS default print job naming conventions, hold down the option-key when selecting Print... from the file menu or when clicking the Print button in the document preview window toolbar.

OSXPrintPanelWithPDF

In the OSX print panel window:

  • To print to paper click the Print button.
  • To print to a .pdf file select Save as PDF... from the PDF menu in the print panel. This will open an OSX file navigation panel in which you can name the file and navigate to where you want to save the file.
  • By default, PS will name the print job (or .pdf file) using the patient name initials. For example the print job name for a patient named 'Onymous, Anne' will be 'OA' or 'OA.pdf'. You can customize the .pdf file name in the file navigation panel.

Printing the document group

To print the document group as currently selected in the preview window Document Group toolbar controls, select Print Doc. Group... from the File menu or click the Print Group button in the preview window toolbar. This will open the OSX print panel window as described above. The print panel for document groups works in exactly the same way as it does for an individual document.

FilePrintGroupMenu
PreviewPrintToolTip

Shortcut: To bypass the OSX print job panel and print directly to a .pdf file in the current patient folder using the PS default print job naming conventions, hold down the option-key when selecting Print Doc. Group... from the file menu or when clicking the Print Group button in the document preview window toolbar.

Hint: Most controls in PS provide explanatory tooltips if you hover the cursor over the control for a short time.