For clinical use, you should always select a plaque for which an .iplq6 file appears in the Plaque Files or Plaque Rentals menu.
- The Custom name is the name of the plaque that PS uses for display purposes.
- The File name is the name of the plaque that PS uses when saving the plaque as an .iplq6 file. The suggested file naming conventions are listed on the right. The final file tag .iplq6 will be added automatically when the file is saved.
- The Plaque model the plaque manufacturer's basic model number (e.g. EP2029, COMS14) for that plaque. It is used when automatically generating file and custom names using the Standard button.
- The PS std. model identifies one of the 150 built-in models to which the plaque is most closely related. This relationship is used to initialize a plaque's default properties should new parameters be added in future versions.
- The In production checkbox indicates that a plaque is currently in production. Examples of plaques that are NOT in production are a few obsolete USC designs from the 1980s and many of the built-in EP models for 3D printing that are not yet available as gold castings.
- The At user institution checkbox should be enabled only for plaques saved as .iplq6 files that are in your institution's local inventory.
- The Available for rental checkbox indicates that a plaque is currently in the IsoAid inventory for their preloaded, presterilized plaque rental program.
The built-in theoretical models of EP plaques that are intended for 3D printing are disabled by default (you can still select them by option-clicking the menu item) and are tagged as not yet in production, not available to rent and not at your institution.
If you attempt to use a plaque that is not in production or at your institution you will receive a warning message.
You can disable warning messages regarding the In production, Available for rental and At user institution parameters in the plaque loading view preferences pane. By default the Available for rental and At user institution warnings are disabled.
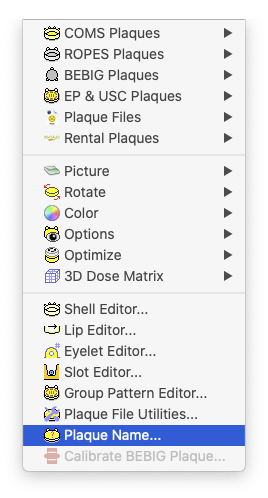
In the Plaque Name properties sheet you can customize the name label appearance, the displayed name and the file name of a plaque. Customizing the displayed name of a plaque might be useful, for instance, when creating alternative treatment plans that use the same plaque model with different seed loadings. The custom name usually defaults to a subset of the plaque's full file name. To access these name properties you can select Plaque Name... from the Plaque menu or double-click on the plaque name label in the window content region if the label is visible.
As of version 6.4.6 Eye Physics has adopted these naming conventions for plaque (.iplq6) files:
- The file name should begin with the Plaque model, the plaque manufacturer's basic model number (e.g. EP2029, COMS14). For EP plaques, the first 2 digits usually indicate the nominal diameter of the plaque in mm (the EP9xx series are an exception) and the last 2 digits of the basic name indicate the number of seed slots in the plaque (e.g. model EP2029 is about 20 mm diameter and holds up to 29 seeds). For COMS style plaques the last 2 digits generally represent the nominal diameter of the plaque in mm (e.g. the COMS14 plaque is about 14 mm diameter).
- Add -e to indicate the plaque shape is approximately elliptical.
- Add -g to indicate a gold seed carrier (e.g. the Paul Finger variants of the COMS plaques).
- Add -n to indicate a notched plaque, use -wn for a wide notch (e.g. model 917) and -dn for a deep notch (e.g. models 930 and 933).
- Add -## to indicate the nominal equatorial diameter (in mm) of the eye that the plaque conforms to.
- Add _## to indicate the % ratio of the minor to major axes of the oblate anterior hemisphere of the eye that the plaque conforms to.
- Add -p to indicate the file includes an embedded picture of the plaque face.
- Add -f to indicate a fast ray tracing model which with reduced tesselation and/or disabled shell collimation. Files lacking the -f tag are primarily intended for 3D stereolithographic printing rather than clinical use. They can be used for clinical calculations but will be slower because they either include the more complex tesselation that is needed for 3D printing and/or default to including collimation ray tracing of the entire outer shell of the plaque which is not usually necessary for EP plaques which also incorporate a collimating slot surrounding each seed where almost all collimation occurs.
- Add -r to indicate a rentable plaque.
- The tags are not case sensitive (e.g. -N is the same as -n).
- Examples of complete file names might be EP917-e-wn-p-f-r.iplq6, EP2029-N-24_95-p-f-r.iplq6, EP2029-n-24_95-p-f-r.iplq6 or COMS14-p-r.iplq6.
- The file tag .iplq6 will be added automatically when the file is saved.
- The order of the -* tags is not manadatory, however Eye Physics encourages using the above example order for consistency with the -r (rentable) tag being the last tag prior to the .iplq6 tag.

In the example above, a model EP917 plaque has been loaded from the file 'EP917-e-wn-p-f-r.iplq6' as plaque #1 of the current patient plan. NOTE: When you save a patient treatment plan, its plaques are embedded in the 'PantientName.iplan6' file package. The plaque file names within the package will be changed to simply 'Plaque1', 'Plaque2', etc... Any changes made to a plaque model that was loaded from a patient plan file (.iplan6) package will, by default, apply only to that embedded copy of the plaque file, not the original plaque file from which it was loaded.
If you want to create a variant of an existing plaque for general use, you should create the new plaque from a built-in model or by opening an .plq6 file located in your plaque files folder, modify the model, rename it, and then save the renamed file in your plaque files folder.