
Madena supports up to 5 Regions of Interest (ROIs) per image. The currently displayed (or "active") ROI is selected from the Regions menu on the menu bar at the top of the screen or one of the 5 ROI buttons just below the histogram. The ROIs are color coded to help you distinguish between them. These colors can not be changed in the current version. You can display all of the ROIs at once if you wish by enabling "Show All ROIs" in the Regions menu.
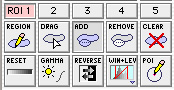
The five buttons just below the ROI buttons are used when drawing or dragging a region-of-interest. To create a new region click the REGION and ADD buttons.
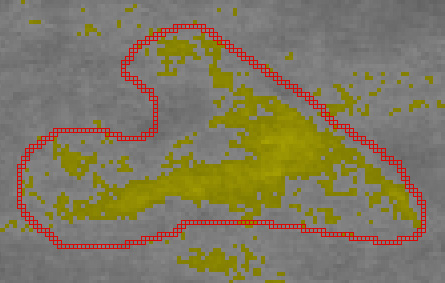
Holding the mouse button down, outline an area that contains densities you wish to identify (eg. for mammogram sessions, exclude the pectoralis muscle, any scarring artifacts, and non-dense areas that are colored when you apply the tint, but that you do not consider to represent densities). In order to close a region you must return to the point at which you started outlining. You can accomplish this by returning to within a few pixels of the starting point, or by double clicking the mouse, or by pressing the space bar on the keyboard. Check that there is some quantity of pixels appearing in the status line at the top of the window after "ROI#n:" where n represents the ROI you are creating.
If you wish to add (union) a new region to an existing ROI simply repeat the steps above. The new region will be merged together with the existing region.
If you wish to remove (subtract) a region from an existing ROI enable both the REGION and REMOVE buttons. Hold the mouse down and draw the region you wish to remove from the existing ROI. Any portion of the new region which intersects the existing ROI will be removed from the existing region.
If you wish to delete the currently selected ROI click the CLEAR button.
Regions are drawn as a floating layer above the image. The perimeter pixels of the region are displayed in outline if you zoom in far enough. These perimeter pixels are INCLUDED in the region. A region can consist of a single pixel if necessary.
Normally, only the currently selected region is displayed. If you want to see all the different ROIs that you have created then go to the Regions menu on the top menu bar and select the option Show all ROIs.
To remove all of the ROIs at the same time use the Delete All Regions item from the Regions menu or the Clear item under the Edit menu (when "Show all ROIs" is enabled).
To move a ROI click the DRAG button. Put the cursor in the middle of the ROI, hold the mouse button down and drag to the new position. Release the mouse button. You can also use the "arrow" keys on the keyboard to nudge a region in single pixel increments when DRAG is enabled. The arrow keys combined with the option modifier key grow or shrink the region.
To duplicate an existing ROI, make the source region the "active" ROI. Select Copy from the Edit men. Next, make the destination ROI the "active" ROI and select Paste from the Edit menu. The standard MacOS keyboard shortcuts are also supported. You can paste a copied ROI into another ROI on the current or a different image.