
Animation Tutorial
- The animated .gif image above was created from a QuickTime movie captured from the sample image "US-PAL-8-10x-echo.dcm" (a 10 frame DICOM Palette color US clip) that accompanies Madena.
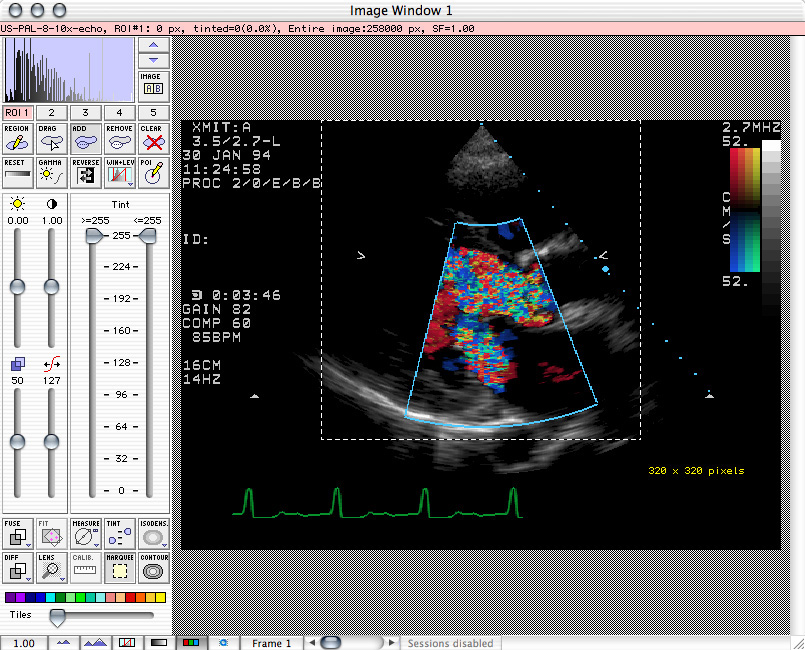
- After opening this 10 frame image, Madena will be in "monochrome"
 image display and processing mode. To recreate the example, switch to color display mode by clicking the RGB button.
- Next, click on the Marquee button
 and drag open a 320 x 320 selection rectangle. Position the marquee as illustrated below. If a selection marquee is active, its contents will be captured as movie frames during animation. If no marquee is enabled, the entire image will be captured instead.
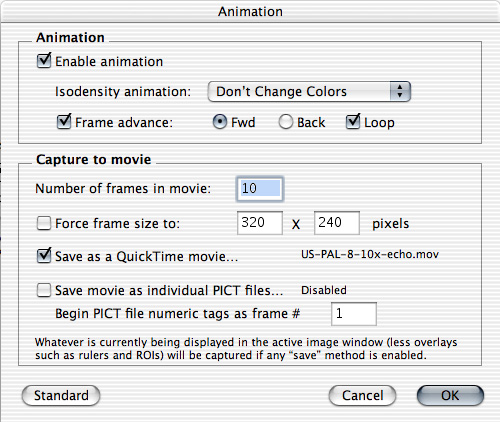
- Click the animation button.
 In the animation dialog enable frame advance, set isodensity animation to "Don't Change Colors", set the number of frames to 10, enable animation, and then click "Save as a QuickTime movie...".
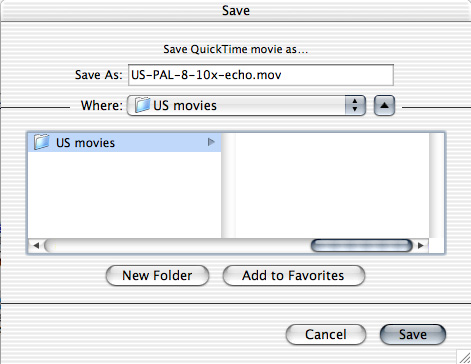
- In the file navigation dialog choose a file name and location in which to store your movie. Click the Save button to exit file navigation and then click the OK button to exit the animation dialog.
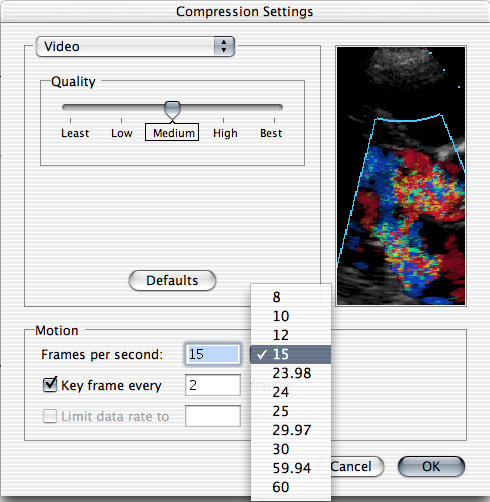
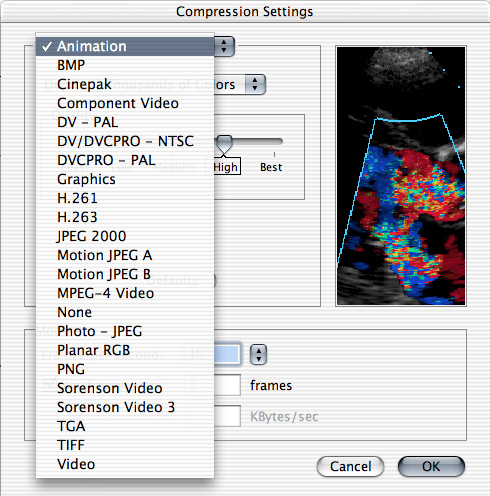
- If you chose to make a QuickTime movie you will then be presented with the standard QuickTime compression settings dialog. Choose the frame rate, compressor, and any other related settings as required.
- The animation will begin and the 10 frames will be captured. When the capture is complete, the movie file will be created. Basically, whatever can be displayed in the image window (except for overlay items like rulers & regions) can be captured. The QuickTime movie can be replayed using the QuickTime player application or even converted into an animated .gif (as illustrated above and below) file using a program like "Webshocker".
The animation example below illustrates isodensity tinting animation of a monochrome image (as opposed to frame animation of a color image as illustrated above). This tutorial also illustrates the use of indexed frames instead of capturing directly to a QuickTime movie. Saving frames to individual PICT files allows you to selectively remove individual frames or post-process the frames with a program like Photoshop. In this instance, there was no advantage to saving individual images except to demonstrate how to do it. You could just as well save directly to a QuickTime movie. To duplicate this example, open the provided sample image "brain.dcm" (this is a DICOM MRI image)
- Use the window and level dialog to optimize the soft tissue contrast.
- From the Image menu choose the Color Palettes item and select "Bluegrass.rgb".
- From the Image menu choose the Isodensity Tables item and select "EdgeWeighted.iso".
 Click the Isodens(ity) button near the bottom left of the image window control panel to colorize the image. This will enable tinting and set the tint sliders to full range.
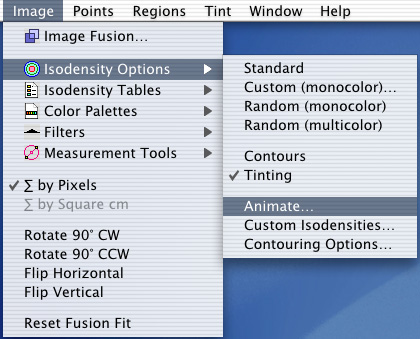
- From the Image menu select Isodensity Options and then select Animate... or click the animation button. .
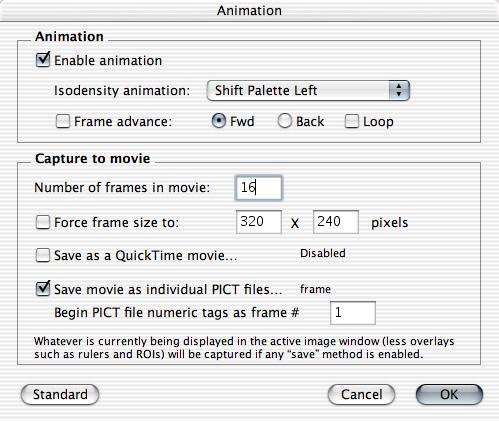
In the Animation Controls dialog:
- Enable animation and select Shift Palette Left from the popup menu of isodensity animation modes. Since this image has only one frame the setting of the Frame advance checkbox is ignored.
- Enter 16 as the number of frames to generate.
- Click the Save movie as individual PICT files... checkbox.
- In the navigation dialog which appears create a new folder named "My Movie" in the location of your choice.
- Set the filename to "frame" (for example).
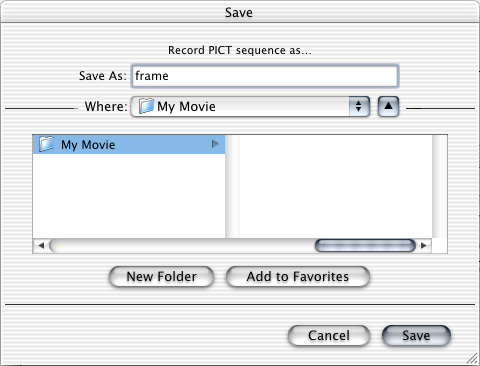
- Click the Save button to return to the Animation dialog.
- Click the OK button to exit the dialog.
- The animation will start immediately and be recorded in the "My Movie" folder as 16 individual PICT image files labeled "frame.1" through "frame.16". After 16 frames have been generated the animation will terminate. You can use either the QuickTime player application's "Open image sequence" function or the older "ConvertToMovie" utility from Apple to turn the images into a QuickTime movie. I used WebShocker 2.2 to convert the movie into an animated gif file.